Spooky Halloween Cakes — Easy Healthy Gluten-Free Cake Pops for the Party Table
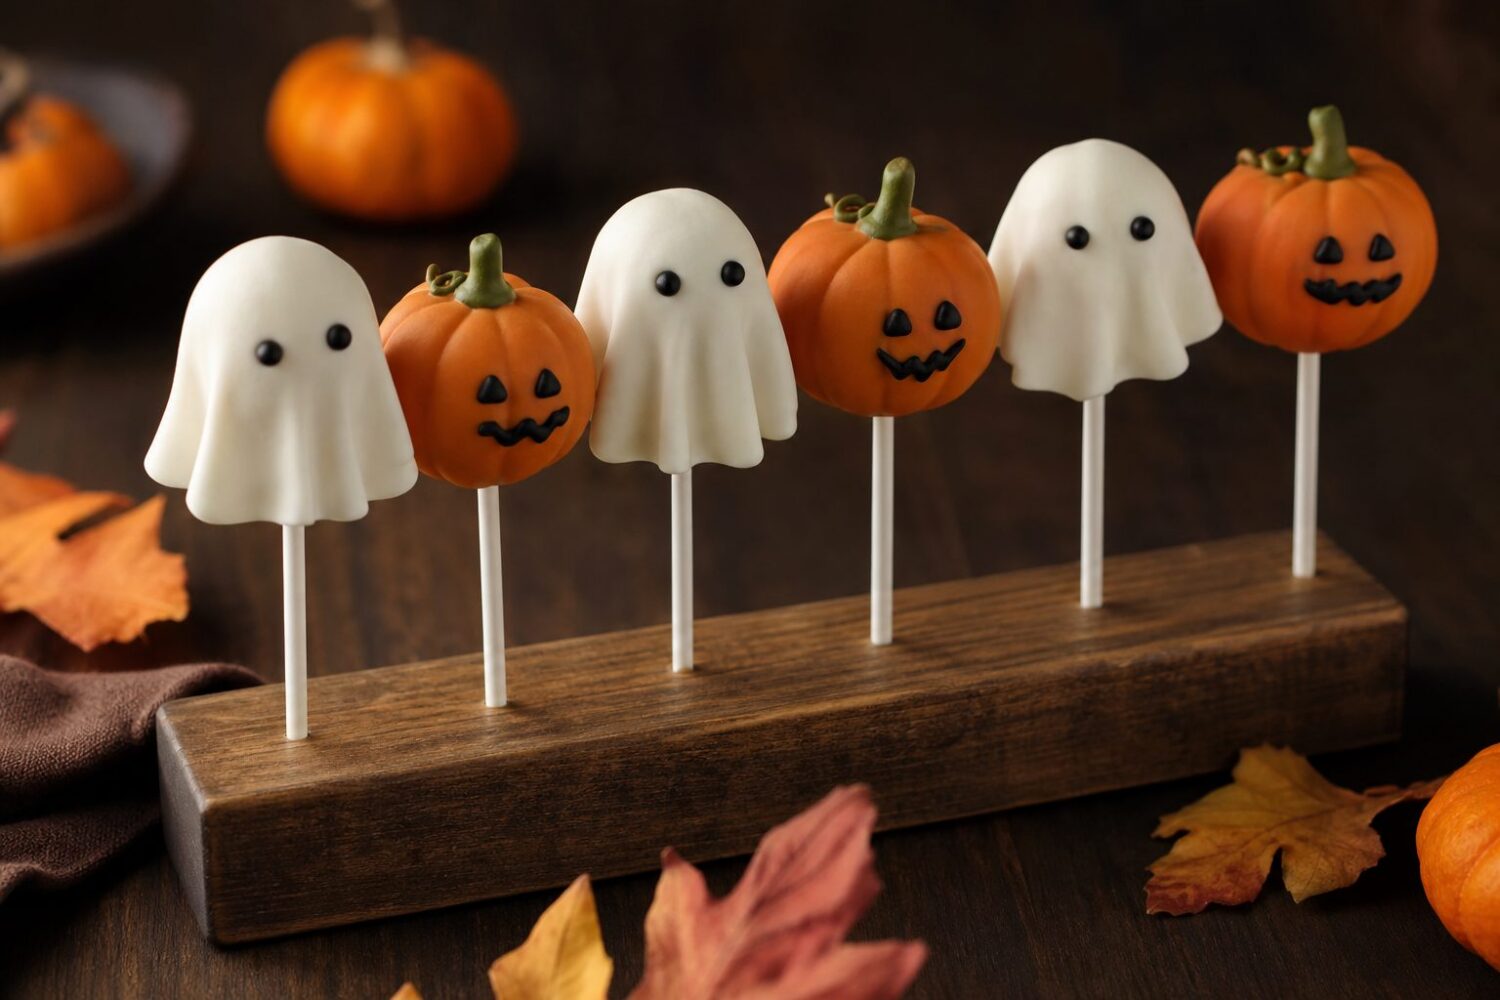
A tray of two dozen cake pops sits on the counter: half dipped in white with two small dot eyes, half dipped in orange with a short green stem on top. That’s really all it takes to read as a ghost or a pumpkin from across a folding table at a school party.
This batch of gluten free cake pops skips the usual full tub of frosting that most cake-pop recipes call for and uses a small amount of applesauce instead, so the inside stays moist without turning gummy or overly sweet.
The result is a plate of spooky halloween cakes in miniature form: small enough for a lunchbox, sturdy enough to survive a car ride to a party, and simple enough that a first-time cake-pop baker can finish a batch of twenty in about an hour.
If you’re looking for something to bring to a classroom or a potluck that isn’t just another bowl of candy, this is built for exactly that.
Ingredients You’ll Need
The base starts with a 9-inch gluten-free chocolate cake, baked ahead of time or picked up as a store-bought gluten-free chocolate cake if the schedule is tight the day before a party. One cake yields enough crumbs for roughly twenty pops once it’s fully cooled and broken down.
Instead of the standard can of frosting, this version uses about a quarter cup of unsweetened applesauce, just enough to bind the crumbs into a dough that holds its shape without tasting like frosting stacked on top of more frosting.
Twenty lollipop sticks, two cups of white candy melts, and one cup of orange candy melts cover the ghost-and-pumpkin split.
Mini chocolate chips work well for eyes on both designs, pressed in point-down so the flat side faces out, and a food-safe black gel pen fills in mouths and any other small details once the coating has fully hardened.
Nothing here requires a special trip beyond the baking aisle, which is part of why this stays an easy recipe even for a Tuesday-night batch before a Friday party.
Making These Gluten-Free Cake Pops Lighter and Healthy
Most cake-pop recipes call for an entire tub of frosting mixed into the crumbled cake, which makes the filling very sweet and fairly heavy for a two-bite treat.
Cutting that back to a quarter cup of applesauce keeps the crumb mixture from turning into fudge and drops the sugar considerably without changing how the pop holds together on the stick.
Combined with the gluten-free cake base, that swap is what makes this a healthy halloween cake pops recipe rather than just a smaller version of a standard dessert: each finished pop runs about 110 calories, 2 grams of protein, and 6 grams of sugar.
That’s a real difference over a party table lined with full-size frosted cupcakes, and it means seconds don’t feel like a decision anyone has to think twice about.
For a house managing a gluten intolerance, using a dedicated gluten-free cake mix or flour blend also means one dessert on the table works for the whole group instead of a separate plate off to the side.
An Easy Decorating Technique for Spooky Halloween Cakes
Dip each chilled ball into the melted candy coating and lift it out by the stick rather than by the ball itself, tapping gently against the side of the bowl to shed the excess before it drips down onto the stick.
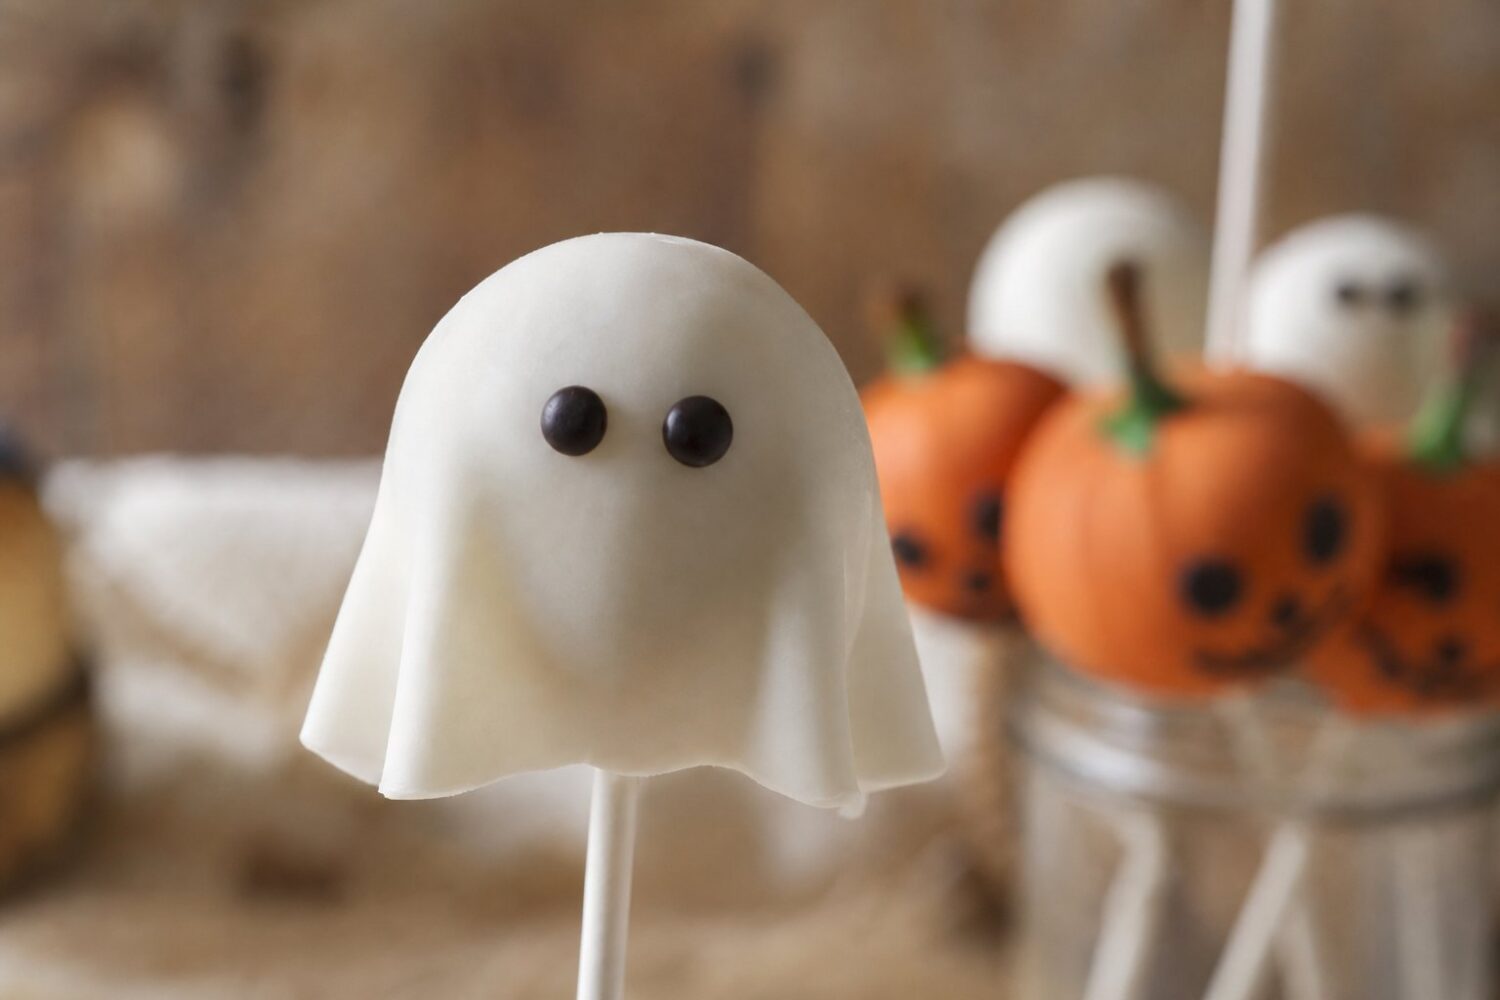
Work in small batches, four or five pops at a time, because the eyes and details only stick to the coating while it’s still wet.
Press two mini chocolate chips into each white pop before it sets, point-down and spaced like eyes on a rounded ghost face, and press a small piece of green candy melt onto each orange pop while it’s still tacky to form a stem.
Once every pop is dipped and standing upright in a foam block or a shoebox lid poked full of holes, let them sit at room temperature for about fifteen minutes before adding a gel-pen mouth or a few stitch marks with black icing.
This is the step that turns plain dipped balls into a full tray of spooky halloween cakes, and it goes quickly once the first four or five are done and the rhythm sets in.
Keeping These Halloween Cake Pops Easy and Healthy
The easiest part of making spooky halloween cakes like these is that the cake itself does most of the work. Choosing a gluten free cake pops base and swapping in applesauce keeps the whole batch on the lighter, healthy halloween cake pops side without turning the decorating into a chore.
That’s really the whole idea behind an easy, healthy Halloween treat: fewer steps, not fewer details.
More Spooky Halloween Cake Designs to Try
The mummy wrap from the base recipe is the most forgiving design, but the same cake pop base carries at least four other spooky Halloween cakes without any new equipment.
Ghosts are the fastest: dip in white chocolate, let the excess drip into a tail, and press on two dark chocolate chip eyes before the shell sets. Slightly uneven drips read as more ghostly, not less.
Pumpkins need orange candy melts and a pretzel stick stub for the stem. Score vertical lines into the shell with a toothpick while it is still soft — six quick strokes turn a sphere into a pumpkin.
Monster eyes take one large candy eyeball pressed into the wet shell, then green drizzle streaked across in any direction. The messier the drizzle, the better the monster.
Spiderwebs are piped in thinned white chocolate over a dark shell: three concentric circles, then a toothpick dragged outward from the center eight times. It sounds fussy and takes about forty seconds per pop.
Making These Gluten-Free Cake Pops Ahead of the Party
Halloween baking always collides with costume logistics, so the timeline matters. The good news: these gluten-free cake pops are better on day two anyway.
The undipped cake balls hold in the fridge for three days, tightly covered, or in the freezer for a month. Frozen balls actually dip more cleanly — the chocolate shell sets on contact instead of sliding.
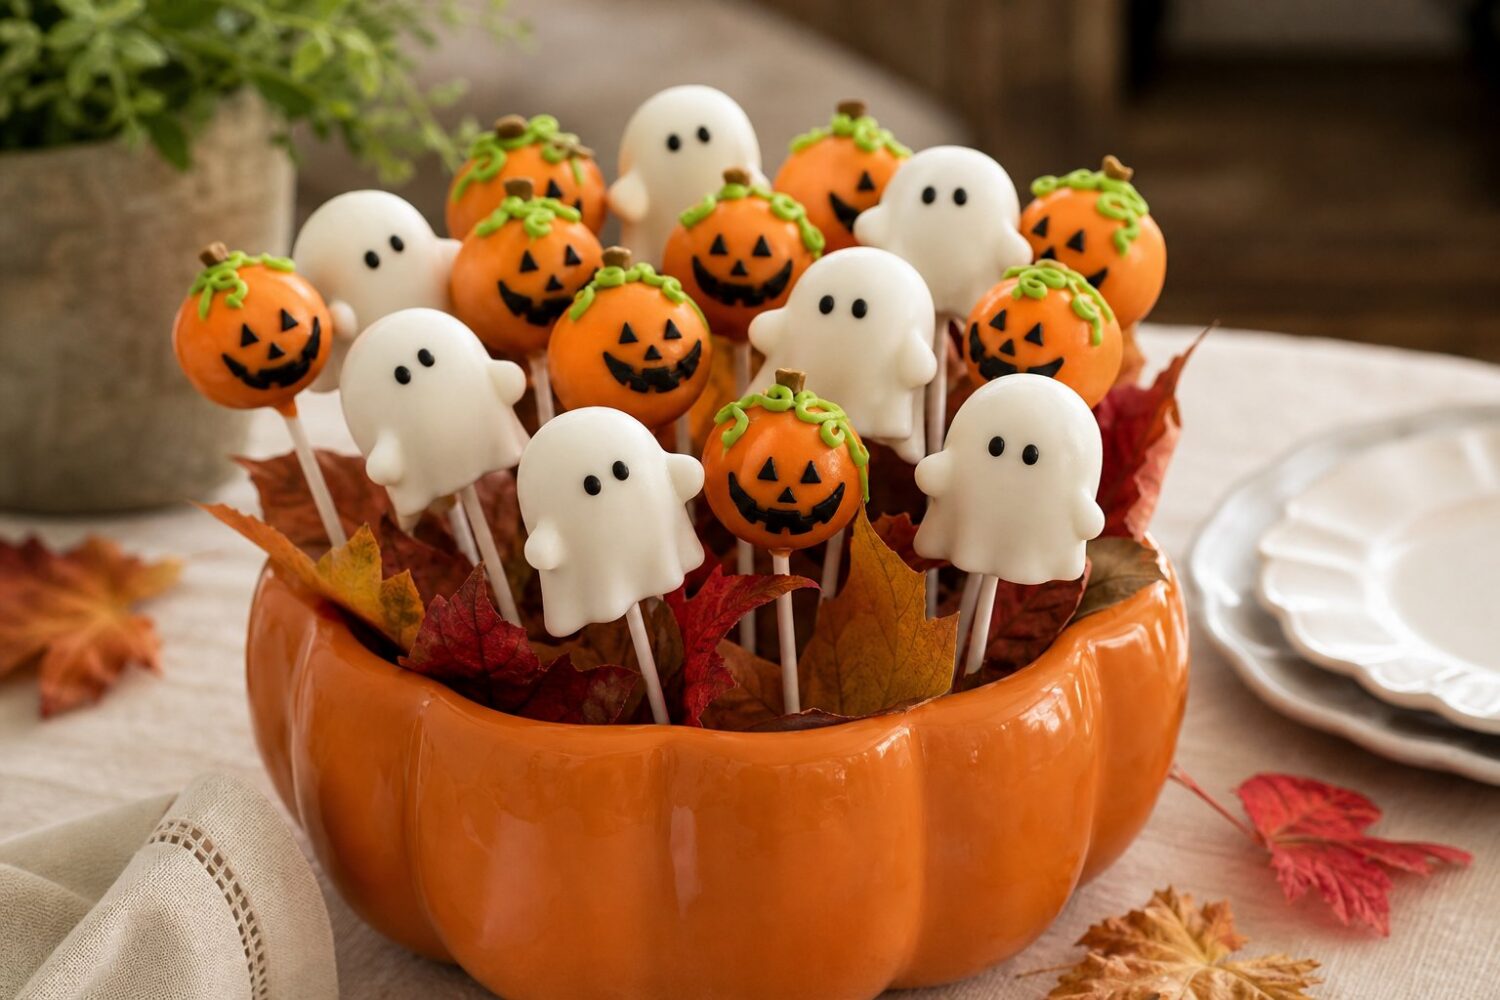
Finished pops keep at cool room temperature for two days, standing upright in a block of florist foam or an inverted colander. The fridge works too, though the shells can sweat when they come back out.
What does not wait: adding the decorative details. Candy eyes glued on with day-old melted chocolate fall off in transit. Attach everything while the original shell is still wet.
Troubleshooting the Chocolate Shell
Cracked shells are the most common failure with any healthy halloween cake pops, and the cause is almost always temperature difference. A frozen-solid ball dipped in warm chocolate contracts as it cools; the shell cannot follow and splits.
The fix is patience: let frozen balls stand for ten minutes before dipping, so they are cold but not arctic. This recipe’s shell went through three test rounds before that number emerged.
Shells that slide off mean the balls were too warm or too smooth. Rolling each ball briefly between your palms before chilling adds just enough texture for the chocolate to grip.
A shell that sets dull instead of glossy usually means overheated chocolate. Melt in short bursts, stirring in between, and stop while a few unmelted pieces remain — the residual heat finishes them.
Sizing the Batch for a Classroom or a Crowd
One batch yields eighteen pops, which covers a typical classroom with a couple of spares for quality control. For bigger crowds, make the cake base in multiples but dip in single-batch waves — melted chocolate holds its ideal dipping temperature for about twenty minutes.
If small hands are helping, assign them the sprinkle and eyeball stations rather than the dipping. The chocolate stays smoother, the decorations land with more enthusiasm than precision, and everyone still claims full credit at the party.
Budget one extra hour the first time regardless of batch size. The dipping rhythm arrives around pop number five, and everything after that moves twice as fast.
Easy Serving Ideas for a Halloween Table
Cake pops stand or lie down, and the choice changes the table. Standing pops in a foam-filled, foil-wrapped “graveyard” box become the centerpiece; laid flat on a platter they are grab-and-go for a class party.
For school events, individually wrapped pops in cellophane with a ribbon travel safely and sidestep most classroom food rules about open trays.
And since these are naturally gluten-free and lighter than the bakery version, they cover the kids in the class who usually get skipped at the treat table — arguably the whole point of making easy spooky Halloween cakes at home.
Frequently Asked Questions
Can gluten free cake pops be made ahead of time?
Yes. The cake base can be baked and crumbled up to two days ahead and kept covered in the refrigerator, and the rolled, chilled balls hold well in an airtight container for a day before dipping. Dip and decorate the same day the pops will be served, since the candy coating looks best within 24 hours of setting.
What makes these healthy halloween cake pops lower in sugar than a typical recipe?
Swapping a full tub of frosting for a quarter cup of unsweetened applesauce cuts a significant amount of added sugar from the filling. Each finished pop comes in at roughly 110 calories, 2 grams of protein, and 6 grams of sugar, which is noticeably lighter than a standard frosting-based cake pop of the same size.
Can the pops be frozen after decorating?
The undipped, rolled balls freeze well in a single layer for up to a month; thaw them in the refrigerator overnight before dipping. Once the candy coating and details are added, freezing tends to dull the shine and can cause condensation spots as the pops thaw, so it’s best to dip and decorate close to serving time instead.
What’s an easy way to keep spooky halloween cakes from cracking during dipping?
Cracking usually means the cake ball is too cold or the coating is too thick. Let chilled balls sit at room temperature for five minutes before dipping, thin the candy melts with a half-teaspoon of vegetable oil if they seem heavy, and dip in one smooth motion rather than swirling the ball around in the bowl.
The foam block used to stand the pops upright works just as well the morning after: a few leftovers, sticks still in, coating still glossy, propped in a mug on the counter next to the coffee maker.
Recipe Card
Nutrition values are good-faith estimates and vary with the exact brands and quantities you use.
Ingredients
- 1 baked gluten-free chocolate cake (9-inch, cooled)
- 1/4 cup unsweetened applesauce
- 20 lollipop sticks
- 2 cups white candy melts
- 1 cup orange candy melts
- Mini chocolate chips (for eyes)
- Black food-safe gel pen (for detail lines)
Instructions
- Crumble the cooled cake into fine crumbs in a large bowl.
- Mix in the applesauce a little at a time until the mixture holds together when pressed, but isn't wet or sticky.
- Roll into 20 balls and insert a lollipop stick into each. Chill for 20 minutes.
- Melt the white and orange candy melts separately according to the package directions.
- Dip each cake pop, tapping off the excess, and stand upright in a foam block or box to set.
- While the coating is still wet, add mini chocolate chips for eyes and use the gel pen for mouths and other details once the coating has fully hardened.
- Store in an airtight container at room temperature for up to 3 days, or refrigerate for up to a week.