Sugar-Free & Vegan Baking Swaps
This collection reworks the classics — pie, shortbread, snickerdoodles, blondies, cheesecake — around sugar-free baking swaps that hold up structurally, not just substitutions that happen to taste sweet. The difference between those two things is the difference between a recipe and a disappointment.
Sugar does real mechanical work in conventional baking: it tenderizes, browns, holds moisture, and adds bulk. Take it out carelessly and the bake collapses, dries, or tastes like something is missing. Every recipe here starts from that problem and solves it on purpose.
The Substitution Math That Holds Up
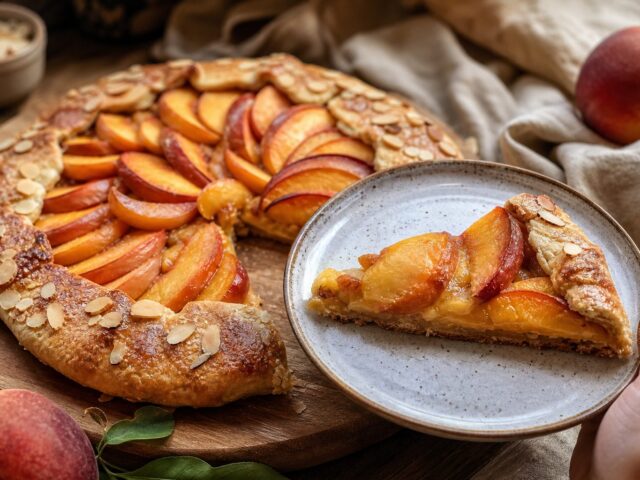
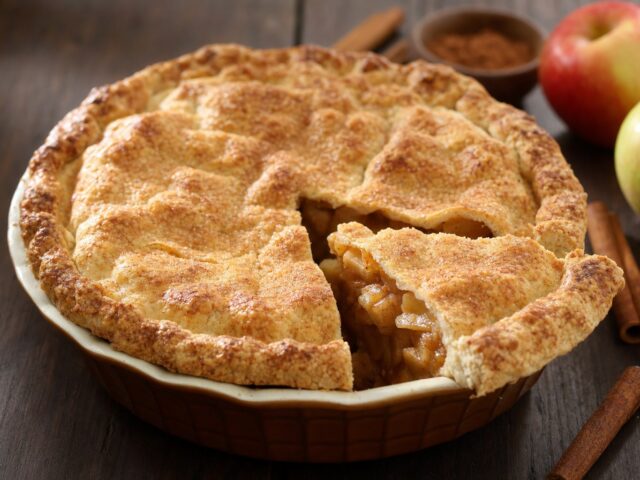
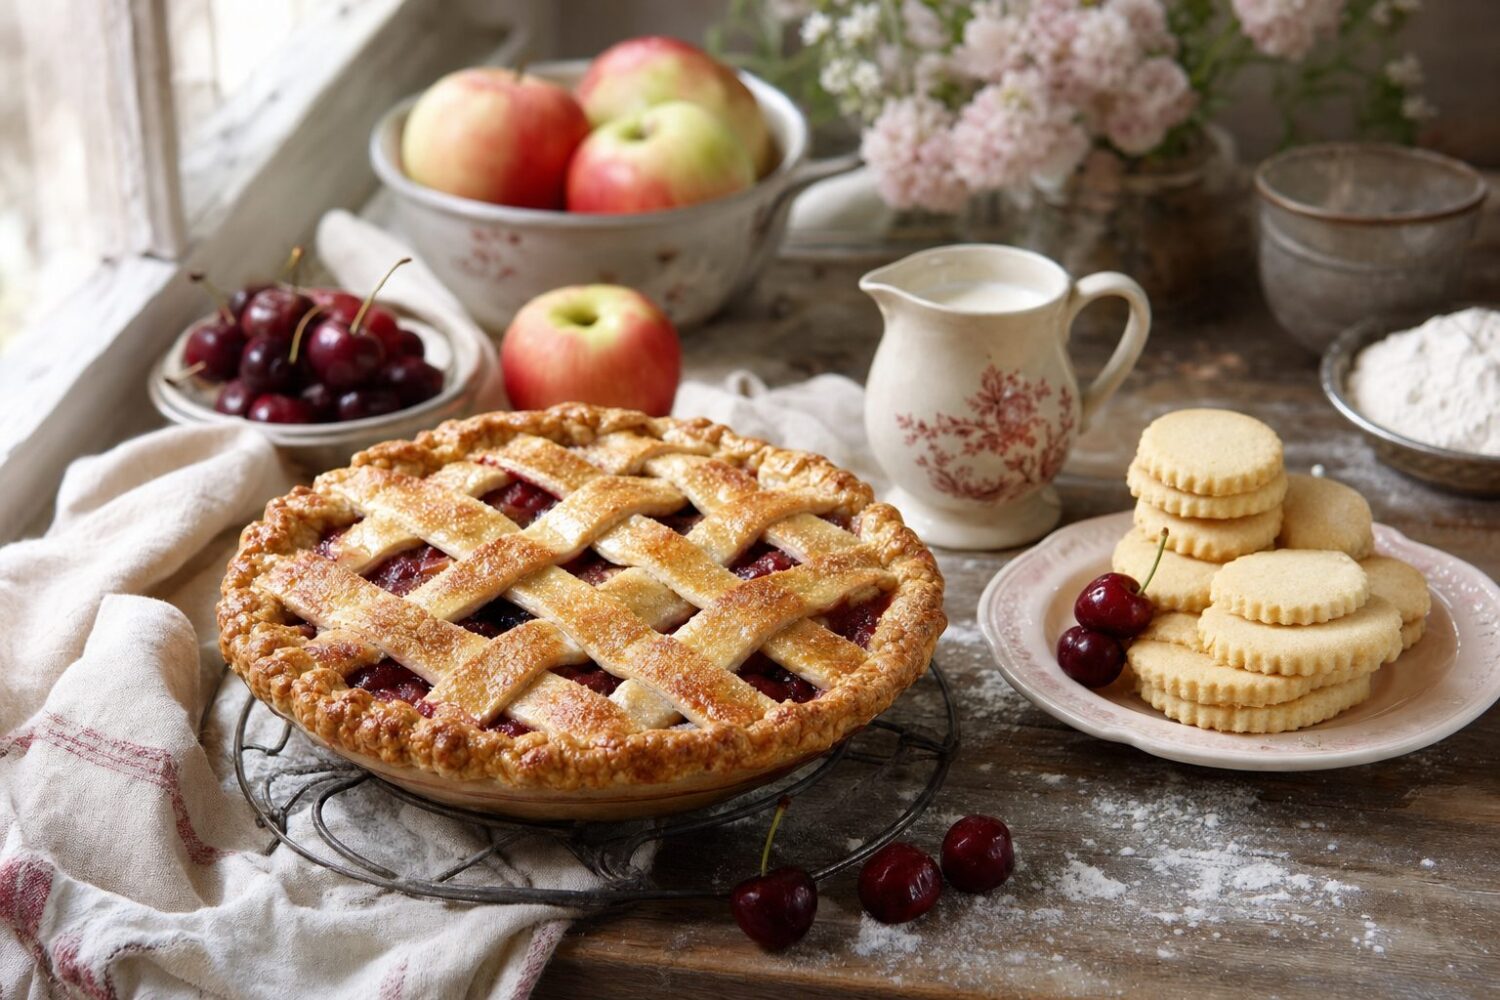
The reliable trick is letting fruit do the heavy lifting. Apples, bananas, dates, and cherries carry more sweetness than most recipe boxes give them credit for — the sugar free apple pie is built almost entirely on what a good Honeycrisp already brings.
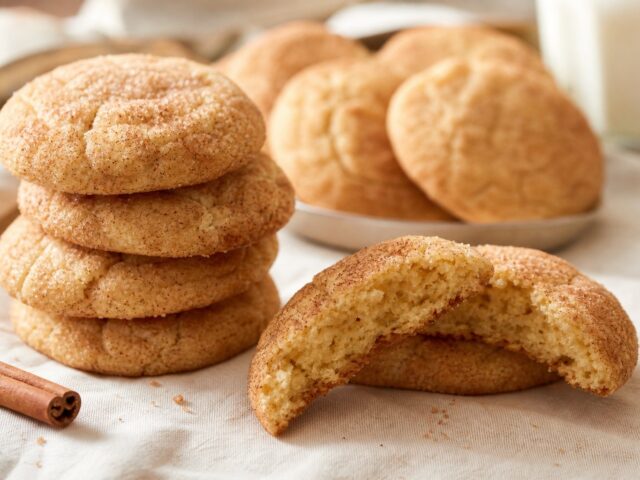
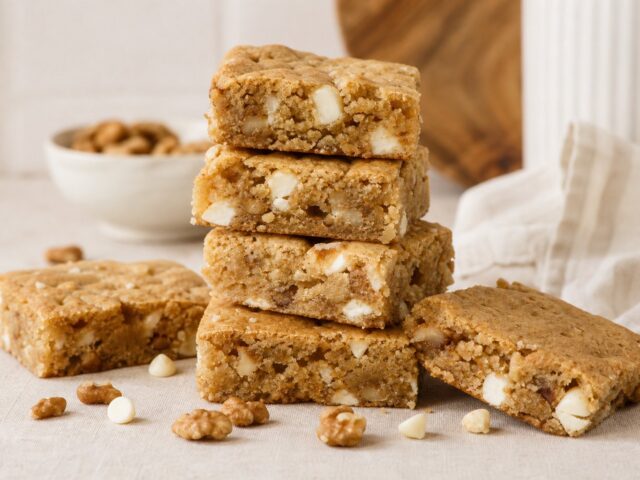
Where structure needs a granulated sweetener, monk fruit blends measure close enough to sugar to behave in a dough, which is why the snickerdoodles and blondies lean on them instead of artificial syrups.
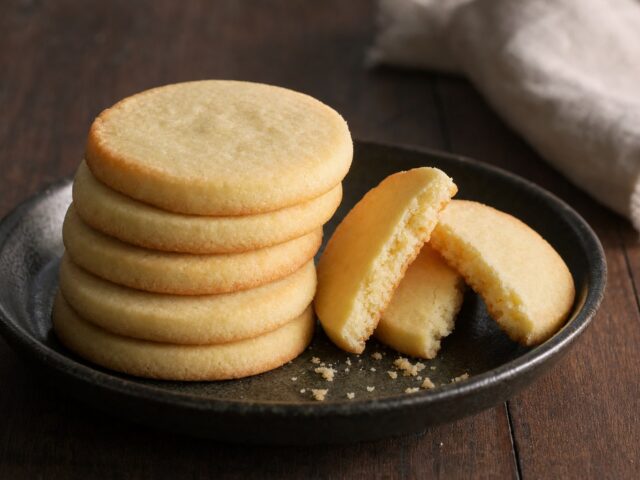
Fat ratios get rebalanced too. A healthy shortbread cookie does not need seven tablespoons of sugar to hold together — it needs the right fat-to-flour ratio, and coconut oil at a very specific proportion delivers it.
Sweeteners That Behave (and Ones That Don’t)
Maple syrup appears wherever a liquid sweetener doubles as a binder, used sparingly. Dates appear blended into fillings where their caramel depth earns the space. Both bring flavor along with sweetness, which is half the reason they work.
Most artificial sweeteners rarely appear in this collection, because most of them behave nothing like sugar in an oven. A sweetener that cannot brown, tenderize, or hold moisture is only solving one of sugar’s four jobs — the recipe still has to solve the other three.
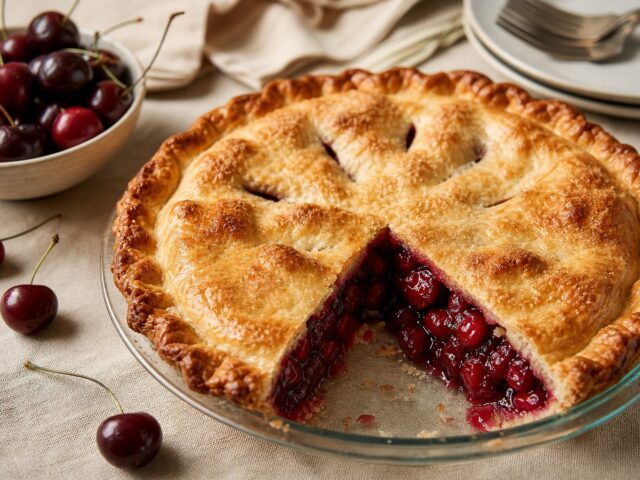
When a recipe genuinely needs no added sweetener at all, it says so plainly. The no sugar added cherry pie gets its entire 8 grams per slice from the cherries themselves.
Vegan and Gluten-Free, Where They Overlap
A surprising share of these sugar-free dessert recipes end up vegan, gluten-free, or both — not as a badge, but because the substitutions overlap. Oat and almond flours replace wheat for texture reasons; coconut oil replaces butter for structural ones.
Each recipe states exactly which labels it earns and which it does not. Nothing here claims gluten-free without the flour swap actually being tested, and cross-contamination always depends on the brands in your own pantry — check labels where it matters.
Where to Start
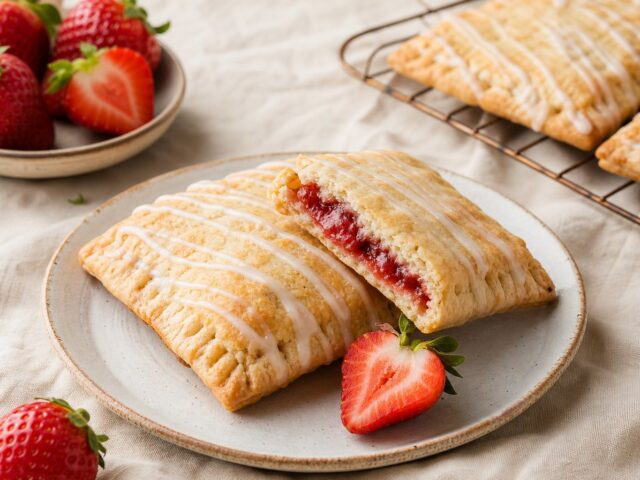
For a showpiece, the apple pie is the collection’s biggest recipe and the most-searched one. For everyday baking, the shortbread and blondies are the fastest wins. For breakfast-adjacent territory, the strawberry pop tarts fill a chia-thickened, no-sugar-added filling into a hand pie that survives a school morning.
The recipe notes flag the step where each one usually goes wrong. Start with the fruit-forward recipes if you are new to sugar-free baking — they are the most forgiving teachers.
What Sugar Was Doing Before You Took It Out
Sugar has four jobs in a conventional bake and only one of them is sweetness. It tenderises by interfering with gluten development, it browns through caramelisation and the Maillard reaction, it holds moisture in the crumb for days, and it adds physical bulk that the recipe was measured around.
A substitution that only replaces the sweetness leaves the other three jobs unfilled, which is why so many sugar-free bakes come out pale, dry by the second day, and shorter than the photograph promised. Every recipe in this collection is built to cover the missing jobs specifically rather than to hit a sweetness target.
Fruit handles moisture and bulk together, which is why bananas, apples and dates appear so often. Extra fat covers tenderness. An egg wash or a slightly hotter oven covers browning. And cinnamon does something worth knowing about: the palate reads it as sweetness, so a generous teaspoon makes a loaf taste sweeter at no cost in sugar at all.
Frequently Asked Questions
Which sugar substitutes actually behave like sugar in an oven?
Almost none of them do all four of sugar’s jobs. Monk fruit and erythritol blends measure close enough to sugar to work in a dough and are the most reliable granulated options, though neither browns. Maple syrup and honey bring moisture and flavour but change the liquid balance, so they cannot simply be swapped in by volume. Most artificial sweeteners solve sweetness alone, which leaves the recipe to solve tenderness, browning and bulk some other way.
Can I just swap sugar for honey or maple syrup one-for-one?
Not without adjusting the rest. Liquid sweeteners add moisture the recipe was not written for, so the usual correction is to reduce the other liquids by about a quarter and drop the oven temperature slightly, since honey browns faster than sugar. They also do not provide bulk, so a cake made this way comes out denser. Recipes here that use maple syrup are built around it from the start rather than substituting it in.
Are these recipes suitable for diabetics?
That is a question for whoever manages your care, not for a recipe collection. What can be said plainly is what is in each one: the sugar figures on the recipe cards are real, they come from the specific ingredients listed, and where the only sugar present arrives inside whole fruit along with its fibre, the recipe says so. Fruit-sweetened is not the same thing as sugar-free, and no recipe here pretends otherwise.
Why did my sugar-free bake come out dry or crumbly?
Usually because bulk went missing along with the sugar. A granulated substitute weighs and occupies less than the sugar it replaced, so the flour ratio quietly increased. The fixes are an extra tablespoon or two of fat, an additional egg, or fruit puree to bring moisture and volume back at the same time. Overbaking compounds it, and a sugar-free bake gives fewer visual cues that it is done, since it browns less.
Are the recipes in this collection gluten-free and vegan too?
A good share end up as both, not as a badge but because the substitutions overlap: oat and almond flours replace wheat for texture reasons, and coconut oil replaces butter for structural ones. Each recipe states exactly which labels it earns. Oat flour is only gluten-free if the oats are certified as such, since standard oats are routinely milled on equipment shared with wheat.